
This brief tutorial covers the steps necessary to copy disk images from an SIO2SD to real floppy disks in an Atari 1050 disk drive. Similar steps may or may not work with another combination of devices. This is the way I do it, there are most likely other (better?) ways to do it.
I also made a video about this process (which also covers making disk images from real floppies with the same method), you can watch it here.
Download MyDOS 4.55
I use MyDOS 4.55 Beta 4 for copying disks across devices. It is super versatile and supports many different disk formats and fast loaders. It also works flawlessly with the SIO2SD and does not require a memory expansion on a stock Atari 800XL/65XE, that’s why I chose this particular version.
Download the disk image here: MyDOS 4.55 Beta 4.atr 
Copy the disk images to an SD card
Use your modern day PC/Mac (or other) to copy the .atr file to your SIO2SD SD card. Put it in the “ATARI” folder so it shows up in the SIO2SD file browser.
Copy the disk image(s) you want to copy to real floppy disks into the “ATARI” folder on the SD card, too.
Set the 1050 disk drive to device number 2
There’s a little switch on the back side of your Atari 1050 labelled “DRIVE SELECT”. It’s a dual switch with a black slider in the front and a white slider behind that. Move the black slider to the right. The white slider should become visible on the left. That’s the setting for device number 2.

Connect the SIO2SD and the 1050 to the Atari
Connect the 1050 to the SIO port on the back of the Atari using a suitable cable. The 1050 has two SIO ports on the back, you can use either one. Connect the SIO2SD to the free port on the 1050.
Boot MyDOS from the SIO2SD
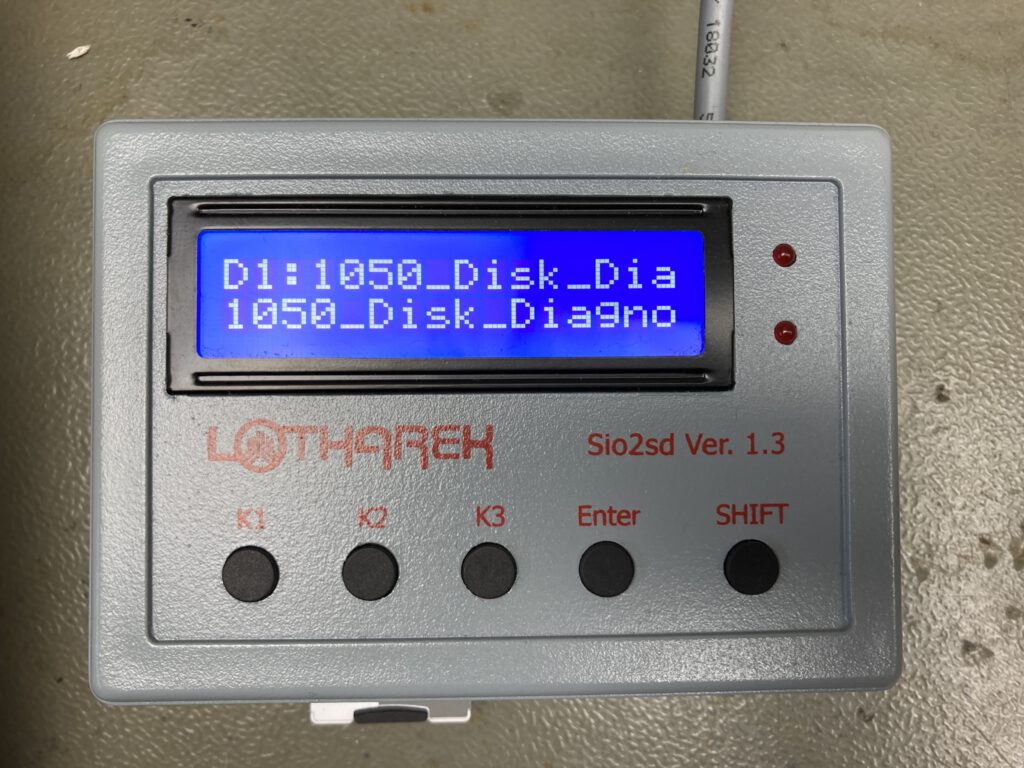
Turn on the 1050 and the Atari. The SIO2SD should be powered through the SIO connectors and the menu should appear on the display. If you have set up your SIO2SD to autostart the file browser, select MyDOS from the list and boot it up. If the SIO2SD doesn’t auto boot the file browser, select device D1 with the K1 button (the display should show “D1:” in the upper left corner. Use the K2 button to select the MyDOS disk image from the list displayed in the bottom row of the display. Press the ENTER button to “insert” the image. You can hold down the SHIFT button and press K1 or K2 to cycle through the devices and files backwards.
Push the START button on the Atari, the MyDOS image should now boot.
Enter “DOS” on the Atari keyboard and push RETURN. You should now see the MyDOS function menu.
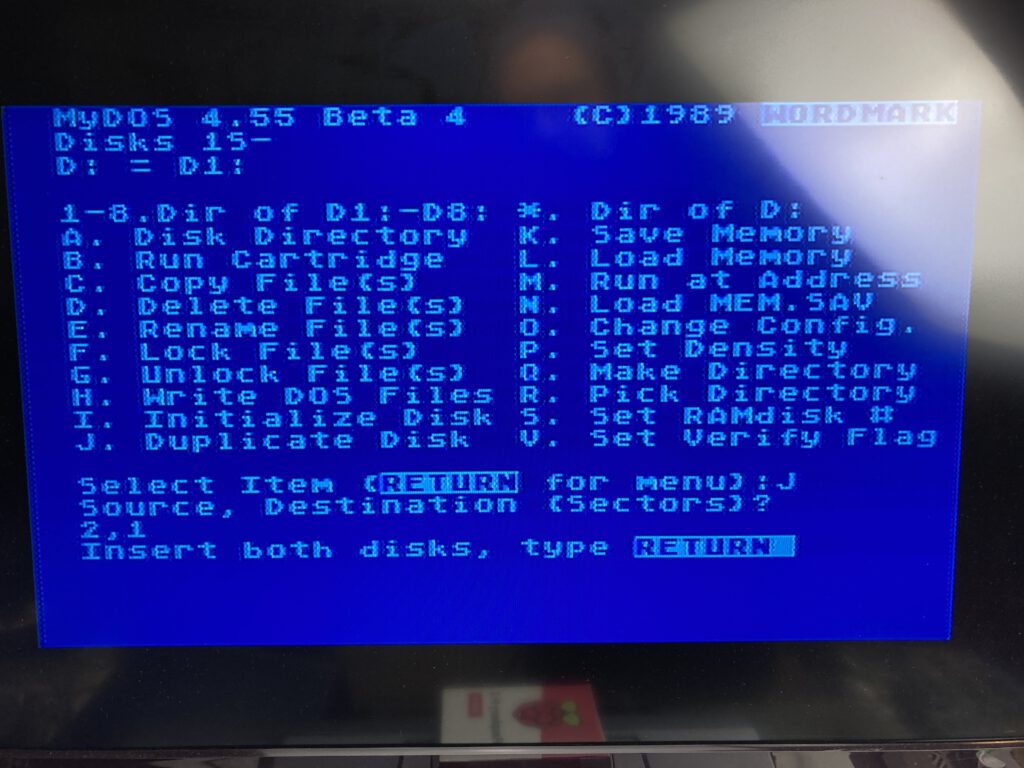
Copy the disk image to a floppy disk
Press “J” and RETURN to choose “Duplicate Disk” from the menu.
You are asked for the source and destination devices. Type “1,2” and hit RETURN.
MyDOS is now waiting for you to insert the disks (or disk images, respectively) into the drives.
Select the disk image you want to write to a real floppy disk from the SIO2SD menu on the internal display. Use K2 and SHIFT-K2 to scroll through the list. Hit ENTER to insert the disk image into D1.
Insert the floppy disk you want to write the image to into the 1050. You commonly use a double sided, double density disk with these drives. ATTENTION: Any previous contents are going to be erased and overwritten with the new contents!
Wait for the drive to stop spinning and for the drive activity LED to turn off. (If you are super impatient, you may skip this step!)
Hit RETURN on the Atari keyboard. That should start the copy process.
When the process is finished, MyDOS asks for your menu choice again. You can also hit RETURN to redraw the menu.
You should now have a 1:1 copy of the disk image on your real floppy disk and can use it with your 1050 or give it to a friend. Hooray!